ffc:fpga
This is an old revision of the document!
Table of Contents
FPGA Software Installation
FPGA python software installation instructions.
Document Transfer
Copy the contents of the “NIST FPGA GUI” folder to local storage. There are five components needed to create the environment for the Comb GUI:
- WinPython 2.7.10.3
- Opal Kelly API
- Python GUI and FPGA firmware
- PyVISA.whl file
- Opal Kelly Front Panel driver
Installation Process for SLICE-FPGA Software
- Install WinPython 2.7.10.3 using the installer “WinPython-64bit-2.7.10.3”. Remember the installation directory.
- Open a new file explorer window and navigate to the WinPython installation (wherever you just installed it) and open the folder \python-2.7.10.amd64\Lib\site-packages.
- Copy the entire “ok” folder into the site-packages directory of the WinPython Installation.
- Open a WinPython command prompt using the shortcut in the WinPython install directory. This provides a command prompt that has the proper path variables to run the GUI using the WinPython installation. Type the following:
- pip install {whl_file_dir}\PyVISA-1.8-py2.py3-none-any.whl.
- Press tab to cycle through the autocomplete options. Example:
- c:\users\osa\WinPython> pip install c:\users\osa\fpga\PyVISA-1.8-py2.py3-none-any.whl
- 3.5. Install the Opal Kelly Front Panel Windows Drivers by double-clicking “FrontPanelUSB-Win-x64-4.5.6”
FPGA Control
The SLICE-FPGA dual-channel Offset Phase Lock Servo can be used to phase lock ƒCEO and ƒopt. Locking fopt requires a reference CW laser and heterodyne setup (such as a 50:50 beam splitter and DWDM filter). The stability of the lock will depend on the reference laser used. All performance data is collected with a Rio Planex laser.
If you have not already done so, install Python and the FPGA software for controlling the SLICE-FPGA dual Offset Phase Lock Servo.
Software Startup
- Open a WinPython command window and navigate to the folder “GUI and Firmware”. Note that a WinPython command window is not the same as the Windows native CMD command line.
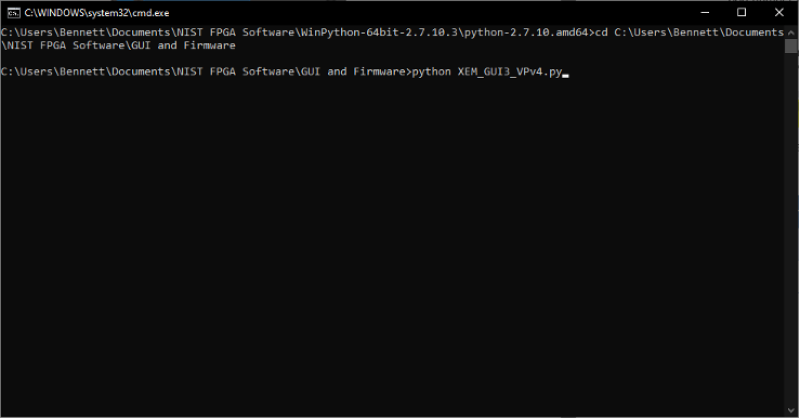
- Start the SLICE-FPGA control GUI by typing “python XEM_GUI3_VPv4.py”, figure 1).
 Fig. 1: Start FPGA GUI from Terminal
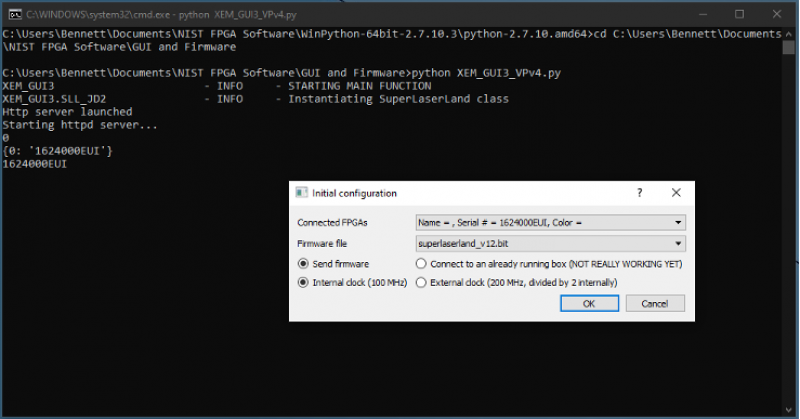
- A start-up menu should appear (figure 2). Make sure “superlaserland_v12.bit” is selected and select an appropriate clock option: internal clock will use the FPGA's on board clock for timing, whereas external clock can be selected to allow synchronization between devices with a separate timing device. If you are unsure which to select, choose Internal Clock. Leave all other settings as default and press OK.
 Fig. 2: FPGA GUI Start Screen
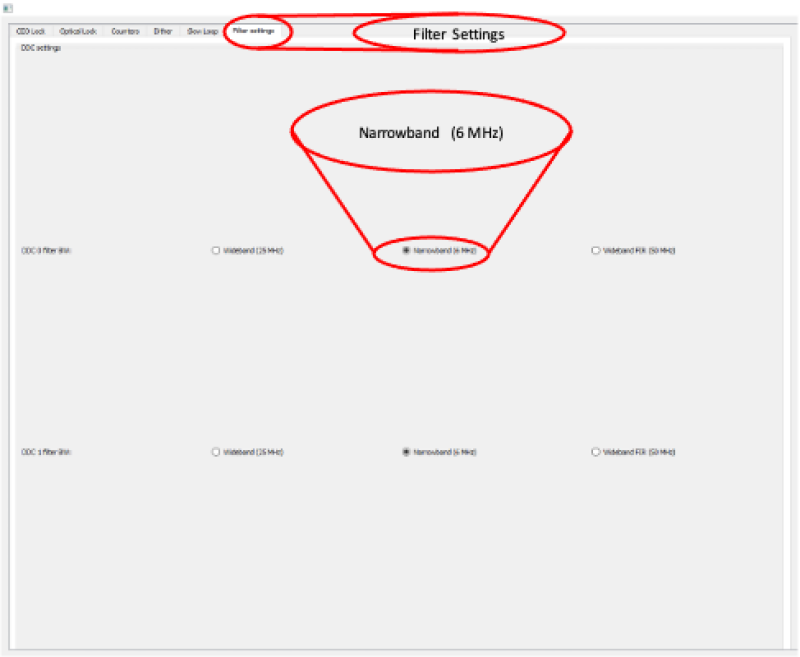
- Navigate to the Filter Settings tab and select “Narrowband (6MHz)” for both DDC0 and DDC1 (figure 3).
 Fig. 3: Set Loop Filter Bandwidth
ffc/fpga.1663773635.txt.gz · Last modified: 2022/09/21 15:20 by 127.0.0.1
